This weeks beauty favorite is the NYX Liquid Suede Cream Lipstick in the color Sandstorm. I have been using this liquid lipstick to death, literally everyday. It is one of those colors that's like your lips but better! It is so easy to use, I don't have to fuss with it, I usually apply a little from the doe foot applicator and then blend it in with my finger all over my lips.
It looks awesome, it applies beautifully. It is so easy to grab it and go. My favorite thing about it is that since it is a liquid lipstick, it is matte and longwearing. I can apply it early in the morning and not need to apply it for like 5-6 hours. That is my kind of lip product.
I have been super impressed with NYX as a whole recently, I think that they really have stepped it up when it comes to their products and availability.
Basically I love this lip color and for the price you can't really go wrong!
Eyebrows are one of those things that need to be done if you are wearing any makeup at all. I think the eyebrows really define the face and frame your eyes. This can be a good thing if the brows are groomed and filled in, or it can be a bad thing if you have less pronounced eyebrows and you don't fill them in. This can sometimes make the makeup look incomplete.
This is one of those things that all depends on you as an individual. There isn't a one size fits all for brows. You have to take into consideration your face shape, hair color, and natural shape of the brows. It is all subjective. I'll be getting in to all the different products and application techniques for filling in your brows.
Starting off with the products that are out there. There is the classic brow powder/eyeshadow. There are brow powders specifically made for your eyebrows or you can just use any eyeshadow powder.
Sometimes these brow kits also include a wax that is supposed to work in conjunction with the powder. You would apply the wax first and then you apply the powder using a small eyeliner/eyebrow brush and it has something to stick to, this also is supposed to make it long wearing.
There are a ton of brands that make these little eyebrow kits from high end to drugstore and everything in between.
Next up is the eyebrow pencil. This has been around forever, it is the easiest way to get the brows filled in. You have the classic pencil that you have to sharpen, and there are also the retractable pencils. These are great when traveling or to have with you in a makeup bag. A lot of these pencils also have a spooly on the opposite end which makes it a breeze to fill in the brows and then comb them out and blend the pencil in.
One of my favorite eyebrow pencil is the Brow Wiz from Anastasia. They also recently launched a different kind of pencil called the Brow Definer. The Anastasia products are really amazing because it actually sets, and it is waterproof. Once your brows are on they are not going anywhere.
Another interesting brow product is the eyebrow marker. I have never tried this product personally. It works the same way a liquid eyeliner works. It is a liquid product with a felt tip applicator. The best way to use these eyebrow marker is to do small strokes. I don't recommend trying to do one fluid line from beginning to end since the hair will get in the way. Doing small strokes will also make the application look very natural and give the illusion that there is more hair. These markers are great if you need to get ready quickly since they are very simple to use.
One product that is all over YouTube is the brow pomade or gels. These typically come in a little pot form and they are exactly like gel eyeliners. I have the Anastasia brow pomade and it really is amazing. All you need is a tiny amount, and you can fill the whole brow in with that. I like using a super tiny angled liner brush and it makes it super simple to get the brows done.
There is also a version of this that is a bit different and it is the brow gel that comes in a tube. Again with this you will need a small angled liner brush to apply this. It works exactly the same way as with the pomade.
The thing with these sort of products is that they are much harsher, if you use too much the brows can look really dark and painted on. The point of filling in the brows is to make them fuller and have more shape, not having painted on brows. Try to use a very light hand when it comes to the pomade products.
The last brow product that is out there is the eyebrow gel to set the brows. These come in all colors and some of these products even have fiber to give the illusion of more hair.
The clear brow gel is the easiest to use since it doesn't have color you don't have to be too careful when it comes to applying it.
There is also brow gels that come in a range of colors from the lightest blonde to the darkest brown. These are perfect for people that already have full brows and you might want to darken them up a bit, or tame them down.
I love using tinted brow gel for days when I don't wear makeup or have very little makeup on. It gives the brows a really nice polished look that is very flattering.
I also use the tinted brow gel to give dimension to the brows when I do fill them in. Sometimes the brows can look a little one dimensional and flat. Using a lighter brow gel over darker eyebrows can really make them stand out.
When applying any product to the brows, I always start off by brushing them through with a spooly. This makes sure that the hair is all going in the same direction and it is the shape you want.
I always like to use a small angled liner brush, the one I love and have been using for years is the Anastasia eyebrow brush #7. This has the brush on one side and a spooly on the other.
I recently made a video showing step by step how I like to fill in my brows. I have been using eyeshadow as brow powder for a long time. It really defines the brows, but keeps it soft with the eyeshadow.
I have an older video where I show how I fill my brows in using a pencil. You can check out either one below.
I am so excited to be getting into the makeup part of my huge back to basics series. If you haven't already checked out my Skin Care Back to Basics mini series, go read all about it: Part 1, Part 2 and Part 3!
In the Makeup mini series, I will be talking about all the basic makeup product that you need and also all the extra goodies that you can add to your makeup routine to get the look that you want. Makeup is all about accentuating what you already have, and it's a ton of fun to play with.
I will be putting these posts up in the order that you would apply the makeup.
I am starting out with primer. Primer is intended to do exactly as it says, it is made to prime your skin before you go in with any other product on top. Primer is used to fill any lumps, bumps and any unevenness that you may have on the skin to smooth and even out the surface. Primer also is made to make anything that you put on top last all day long.
You can apply primer with your clean hands, you can also use a clean brush or even makeup sponges. Really it is up to you. I always just use my fingers to work the primer into my skin. It's super fast and I don't get any of my tools dirty.
There are many different types of primers that are used for all kinds of things. There are just regular primers that the sole purpose is to even out the skin tone and make the makeup last all day. These primers are intended to be used by any skin type. Here are a few examples of regular primers.
There are also primers that are made for people that have oily skin. These sort of primers usually will say that they are mattifying. These will make your skin look matte as soon as you apply them to the skin. They prevent oil from escaping during the day. Some people even use these sort of primers even if the are not wearing makeup to reduce the amount of oil that will show on the skin. Here are some examples of what a mattifying primer looks like. As you can see there are great options for any budget. Honestly they all do the same thing, choosing one comes down to personal preference.
There are also primers designed for dry skin. These kind of primers usually tend to say things like "hydrating" or "luminous." These primers are made to make your skin look like its glowing from the inside out. These are also great to use in the cold winter months, when the skin tends to get dry. Again, all companies carry these. So there's something out there for everyone.
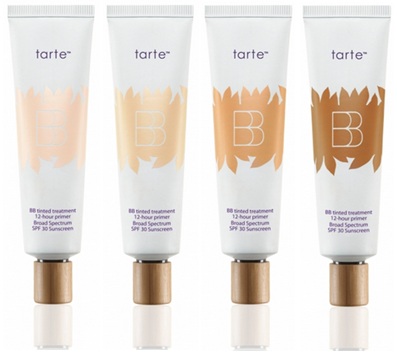
Also out there are tinted primers. These primers are made with a tone or color to them already. These are great for people that don't need the coverage from a foundation because the primer has a small amount of tint to it. These work great for a little wash of color all over the skin on days where a full coverage foundation isn't needed. These also work great for people that need a lot of coverage, because you can then layer your foundation over top and it will give you more coverage.
Another great thing that primer is used for is with powder foundations. When you use a powder foundation you really need to make sure that the powder has something to stick to. Using a primer is the best way to get your powder foundation to stick and to stay put all day.
Let me know what primers are your favorite and how you like to use them.
Next up on my Makeup Back To Basics series is foundation and concealers!
All pictures on this post are from Google.com for reference.
Today I am going to be sharing my thoughts on the Nars Radiant Creamy Concealer and the Maybelline Fit Me Concealer. I will be reviewing both products and then at the end I will tell you which one I prefer.
The first concealer of these two that I used was the Nars Radiant Creamy concealer. Like most of the products I talk about, I was sucked in to the YouTube vortex of product doom when basically everyone on YT was talking about the Nars concealer. So I went to my neighborhood Sephora and picked up the concealer in the shade vanilla.
First thing I didn't like was the price. This concealer costs $28, and that is for .22 oz of product. How much product is that you ask? A LITTLE BIT, that's how much!
So clearly this product is a high end product, and you're basically paying for the name and pretty packaging. I was expecting this concealer to be amazingggg! I was not disappointed. I really loved this concealer. It was the perfect consistency for covering dark circles and even using it as a cream highlight. It blends out really well, with a sponge or a brush or just your fingers. Truly, it is a very nice concealer.
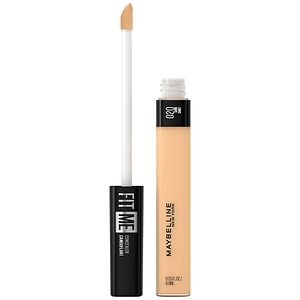
I had also heard a lot about the Maybelline Fit Me concealer, and that this was a great dupe for the Nars concealer.
In one of my last visits to the drugstore, I decided to give the Maybelline concealer a chance. I really wanted to see for myself if it was really comparable to the Nars concealer.
Since these are only $7.29 (for .23 oz) I got the 3 lightest shades that were available ( 10, 15 and 20.)
So even buying 3 of these concealers I didn't reach the $28 price for only one of the Nars concealers.
These concealers, I must say, were a surprise. As they are drugstore products I honestly was not expecting a lot from them. But I ended up really loving these concealers. I most often use the number 20, that is about 2-3 shades lighter than my natural skin tone. I love the opacity of these concealers. It does a great job of covering my dark circles, highlighting and I even use it to conceal spots. It blends out so nice, it doesn't disappear after blending it. It really brightens up the under eye area and makes the overall base look amazing. I recently talked about this concealer in my September Favorites video that is up on my YouTube.
The Maybelline Fit Me concealer is definitely an amazing dupe for the Nars Radiant Creamy concealer. But It's also just a great concealer in general. Both of these are super comparable. I would say that the Maybelline concealer is the winner because of how affordable it is. You can buy about 4 of these concealers for the price of one of the Nars concealers.
So why spend all that money on a product if there is one that is just as good for a quarter of the price!
Let me know what concealer is your favorite!
Thanks for taking the time to check out my blog!
Today I wanted to compare for you the Kat Von D Shade and Light Contour Palette against the Anastasia Contour Kit. I have had the KVD product for a few months now, and I really like this palette. I wrote a full review on the Anastasia Contour Kit in one of my last posts, you can check that out here: Anastasia Beverly Hills Contour Palette Review
So originally I got sucked into the YouTube vortex and I bought the Anastasia Contour Kit a few weeks after it was released. I thought I liked it because it worked well enough. But after about 1-2 months, I wasn't really reaching for it as much. And it turned into one of those forgotten palettes that lives in the back of the drawer.
Then I decided on a whim to get the Kat Von D Shade and Light palette. When I started using this palette, I immediately noticed how much better it was then the Anastasia Contour Kit.
Here are my reasons why the KVD Shade and Light palette wins over the Anastasia Contour Kit.
Numero One, there is a ton more product in the Kat Von D palette as opposed to the Contour Kit. This picture clearly shows the size difference:
Number dos, the powders in the S&L palette are so smooth and silky, I cant even believe it! I usually powder my face before applying any contour powder, but with how smooth these powders are, even if you go in right after foundation it won't be streaky or patchy.
Now with the Contour kit, even if I powdered before applying it the result would be blotchy and patchy, and it was a nightmare to blend the contour shades out. To make this work, I would start with as little product as possible and slowly build it up.
To sum it all up, I am all for the contour shades in the Kat Von D palette over the Anastasia palette.
Now the thing that I didn't like in either of the palettes is the highlighting shades. In the Anastasia Contour Kit, the light shades did nothing on my skin. When I say nothing, I mean it was like I didn't apply anything. Even the shimmery shade had basically no effect on my skin.
In the Kat Von D palette, I feel like the highlighting colors are just off. Like the yellow is too yellow and the pink is too pink. I must say these hardly showed up on my skin either.
And using either of these highlights to set my under-eye concealer, was just a nightmare. It was crease-fest before I even finished the rest of my face.
But overall, I would have to give it to the Kat Von D palette!
What are your opinions on these two palette? Which one is your favorite? Let me know!
Today I will be reviewing the Too Faced Chocolate Bar palette. This palette has been out for a while now. So I hope you guys enjoy this review and be sure to leave your comments and thoughts on this product or any other fun makeup things that you think I should try.
To begin the review I have to talk about the scent. This palette smells amazingggg! It smells just like chocolate. If you haven't smelled this palette, I urge you to visit your nearest Sephora or Ulta and take a whiff of this palette.
Although this might seem like a gimmick (which it totally is) it makes the palette a little more interesting.
So on to the most important part, the colors. This palette has 16 colors with two of those being a shimmery highlight and a matte highlight. One of my favorite things about this palette is that it has both a matte and shimmery highlight. This makes it so convenient for traveling because you have 2 highlights in one palette.
Another thing I really enjoy about this palette is that it has many different colors in it. It has the very classic light and dark browns, but it also has a very cool pink and warmer brown, a cooler sort of purple silver color, some very pretty champagne, gold and copper colors.
With all the different ranges of tones in these colors this palette can be very versatile and easy to use every day.
I love that this palette has basically every color that you could need to create any neutral eye look. The Chocolate Bar would be perfect to take on trips because all the colors you would need are in one palette.
Now on to the color payoff on these eyeshadows. I absolutely love the way that these colors apply to the skin. With or without a primer the colors are vibrant and very easy to blend, even the matte colors. The shadows are very smooth and silky. I love that I don't need to use a primer, even on the shimmery colors. There is a little fall out if you don't tap off your brush before you apply it, but it's not terrible.
The staying power is really nice as well. I usually have the eyeshadows on all day, and they don't seem to move. If you have greasier eyelids or need to make sure the colors don't move I would suggest to use a primer.
All in all this palette is a total winner in my book. I have been using it every single day from very simple easy looks to more sultry and smokey looks.
I give this palette a 9 out of 10. I give it a 9 and not a 10 because somehow this palette ended up breaking on me. I'm really not sure how that happened because it lives on my vanity table and doesn't move from that spot. But non the less, the lid has completely come off and I can't find a way to fix it other than some bright green washi tape.
I hope this review was helpful to you. If you guys have tried this palette or the newer Semi-Sweet Chocolate Bar palette, be sure to leave your thoughts on these products. I would love to hear your opinions.
I am so excited to be talking about my new Life Planner from Erin Condren! I have been watching reviews on YouTube for a while now on these planners, and I finally decided to treat myself and order one.
So to start I got my planner off the Erin Condren website. I also bought a few add on's that I'll get into later on, and the total for everything I got was about $60 (including shipping.)
The first person I saw talking about this planner was Jen from OrganizedJen.com early last year. I really appreciated how in-depth Jen went into reviewing the planner. Then she posted about the new planner she got from EC and it reminded me how much I missed having a planner. I was then sucked in completely when Elle Fowler talked about her planner on her blog Dreaming in Blush.
So I ordered my planner at the tail end of January and I got it in February. I was super impressed by how pretty it is! I have been wishing for Spring so I got a really fun and bright print on the cover and I also had them personalize it with my name.
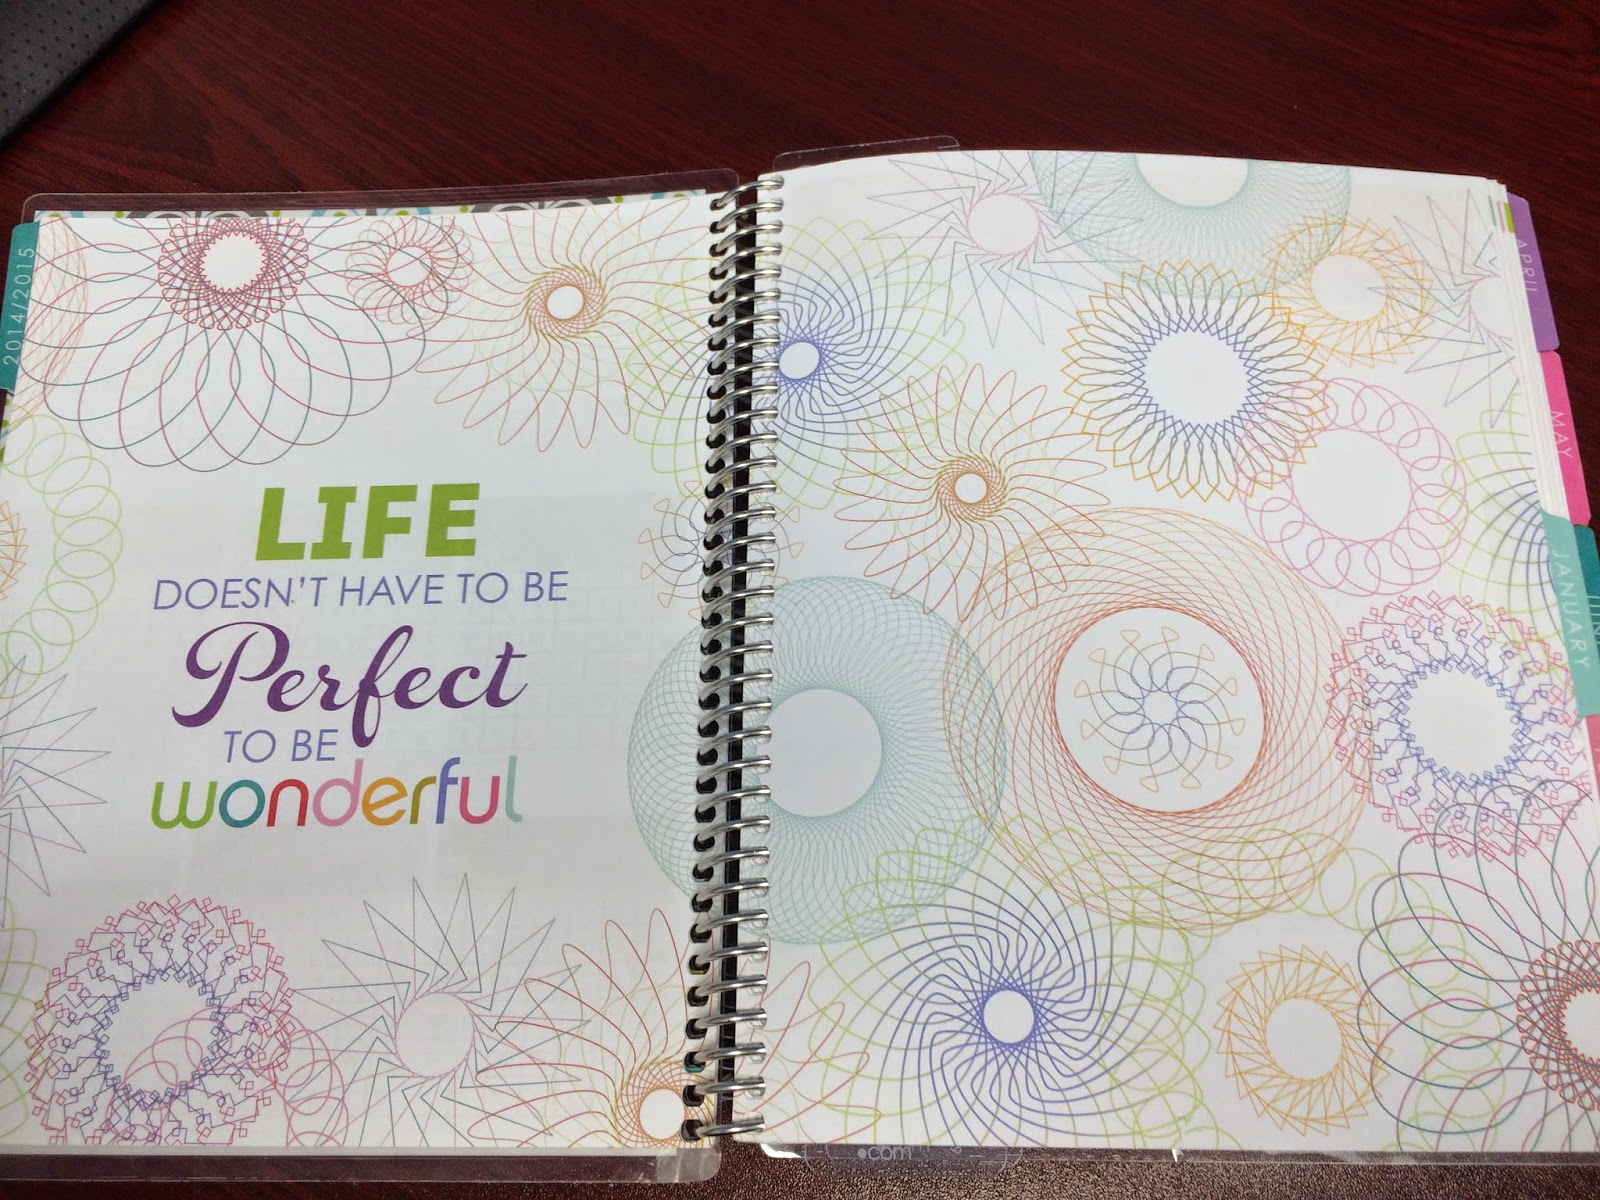
This planner is giving me life right now! I love how bright and colorful it is on the inside. Every page is so cute and fun to look at. I hardly wanted to start writing in it because its so pretty. I really enjoy the month on 2 pages. There is more than enough space to write in and it also has a notes section in the month on 2 pages view.
The week on 2 pages is perfect! It is divided by "morning," "day" and "night." and it has a ton of space for notes around the week outline.
This planner can work for you, whatever you need it for I think that it would be great. It has a great little section in the back with lined paper for notes and such. It also comes with blank stickers and stickers that have things written on them already. It comes with a little clear pouch in the back where I keep my pencils and pens.
This planner was definitely well worth the money and I recommend it to anyone that loves to write and plan things out.
I have had the planner now for a month and I have used it every single day. I love having a place where I can organize all my thoughts and plans for the upcoming week. I also like to keep track of my school and work hours on my planner. It keeps me organized and it also helps me stay on track and not forget things that need to get done.
From the website I also ordered and extra ruler/book mark, I got some extra blank stickers, and perpetual calender. I really love having two book marks. I keep one in the week I am currently in, and I keep the other one in the back of the book in the lined paper section, where I write notes about my blog.
I really have been loving my planner. I highly recommend it to people that love writing things out and using a planner. If you know that you won't keep up with it, or you get bored easily, then I suggest you don't spend the money.
But I'm getting ahead of myself, lets start from the top...
Hey everyone! Welcome back to my blog! I am so excited about today's post, because I am going to be talking about the Nars Radiant Creamy Concealer.
I have been completely obsessed with this concealer for the past few months. And I have not been able to put it down. I have had to repurchase it already 4 times. I love it that much! I even used it as a foundation for a while. It is really an amazing product and I wanted to share it with you!
I picked this concealer up at Sephora and it retails for $29. I am in the shade "Custard." They do have a pretty good color range, and I really like that they have yellow and pink tones. The color Custard has a more yellow undertone to it, which goes very well with my olive (yellow) undertones in my skin.
Honestly the price was the only reason it took me this long to finally commit and buy it. But I have to say that the price is worth the product. I do wish there was a little more product, but that's life.
So moving on, this concealer has been a life changer for me. I am a sufferer of the "designer eye-bags" and it has been a struggle trying to find a product that concealed and brightened my under-eye area.
I have had to deal with the concealers that last only like 4 hours and then they magically disappear off my face. Also the concealers that just sink into my fine lines and this makes the fine lines look like giant wrinkles, come on, I'm only 22! We can't have that.
But like I said, when I tried the Radiant Creamy Concealer, I was in concealer heaven! The concealer is very opaque, but not cakey. We never want cake-face. The concealer still feels light weight, like I have barely any on, which is awesome if I want to layer it on. The color is really similar to my winter skin tone but it's still really lightening under the eyes. Which makes me one happy girl.
The wear on this concealer is amazing! I apply the concealer in the morning when I am getting ready for work, and by the time I'm removing my makeup at 10pm, this concealer is still there! It has lasted me up to 10 hours,
One thing I have noticed is that if I don't properly set the concealer under my eyes, it can crease a tiny bit in my fine line. An easy way to get rid of this crease is to apply a little powder over top and it takes away the crease while not removing any more of the concealer.
At one point I even used this concealer all over my face as a foundation. I think it even works better then other foundations. It is more pigmented so it covers problem areas much better. I also loved that I only needed one layer only on problem spots and that was enough. As opposed to using a regular foundation and then applying a concealer over that.
I would recommend this product to anyone that has darker under-eye circles or if you have acne scar, hyper-pigmentation, or any type of discoloration. This concealer will be amazing! Even if you have pretty good skin, you can use this product only where it is needed and it will blend in perfectly with your skin.
This concealer for me is a 9 out of 10. The only reason I'm not giving it a 10 is because I think for $29 we should get much more product than what is in the little tube.
That's it for today's post, I hope you found this review helpful. Thanks for checking out my blog!
I hope you guys are having a great week so far. I won't be uploading any videos this week, I will be posting on my regular schedule next week. So in the meantime I wanted to write a quick review on a recent purchase. I went to the MAC store recently and picked up a few things that I have been wanting, and one of those things is the MAC Prep and Prime Highlighter in the color Light Boost.
I made a video where I showed you guys all the things I got at MAC, if you want to check that out click here: MAC Makeup Haul Spring 2014
I wanted to try this product out because I love me some highlighter. I think it makes the whole face look luminous and pretty, and I love it. I always just used concealers as cream highlighters, and that works really well, but sometimes it can get a little cakey, and as I have established, that's not a good look.
So I wanted to try something that was actually made to be a highlighter. So I picked it up. I have been using it every day since I got it, and I have to say I am sooooooo happy with how it looks on my skin. I love that it has a yellow undertone that complements my skin tone perfectly. It is super creamy and easy to blend, and it also blends amazingly into my foundation.
I have been putting this around my mouth, around my nose, under my eyes and also down the center of my face. I just use my foundation brush, the Sigma F80 Flat Top Kabuki brush, to blend it into my skin. It literally takes like 10 seconds and it is all blended and looking perfect. I love that it doesn't make me look super ghostly white because it has that yellow undertone. It brightens my face and makes my skin look healthy.
I really am loving this product and how easy it is to apply compared to when I use a concealer as a highlighter.
I would give this product a 5 out of 5. It is super easy to blend into my foundation, it is light and creamy, it makes my face look amazingggg.
I wanted to write this quick review on the L'Oreal Colour Riche Extraordinaire Lip Color. I have the color 106 Fuchsia Orchestra and I purchased it at my local Walmart for about $10.
I had never tried this product but I had to buy it if only for the color. It is the most beautiful fuchsia I have ever seen. It is a gorgeous color.
The packaging is a little weird, the larger part is where the lip color is and the skinnier part is the applicator.
This lip product looks like a lip gloss, it has the same texture and consistency as most lip glosses. The only difference is that this product has the pigmentation of a lipstick. It is super smooth when being applied. The product is very comfortable on the lips, and the lasting power is beyond amazing.
I usually apply this product on early in the morning and it's very shiny at first. After a about an hour or so, it kind of dries but it still is very comfortable. It doesn't dry out my lips, and the product doesn't crack or bleed. The color stays on my lips for close to 8 hours, which blows my mind.
I really have nothing bad to say about this lip product. I recommend this product if you want something long lasting and pigmented.
I really love this product, and I loooove the color.






.JPG)
.JPG)
.JPG)
.JPG)

.JPG)
.JPG)
.JPG)


.JPG)
.jpeg)
.jpeg)
.jpeg)
.jpeg)
